Saturday, August 10, 2013


Water Storage
Commercially bottled water in PETE (or PET) plastic containers may be purchased. Follow the container’s “best if used by” dates as a rotation guideline. Avoid plastic containers that are not PETE plastic.
If you choose to package water yourself, consider the following guidelines:
Containers
Use only food-grade containers. Smaller containers made of PETE plastic or heavier plastic buckets or drums work well.
Clean, sanitize, and thoroughly rinse all containers prior to use. A sanitizing solution can be prepared by adding 5 ml (1 teaspoon) of liquid household chlorine bleach (5 to 6% sodium hypochlorite) to 1 liter (one quart) of water. Only household bleach without thickeners, scents, or additives should be used.
Do not use plastic milk jugs, because they do not seal well and tend to become brittle over time.
Do not use containers previously used to store non-food products.
Some good choices:
30-55 gallon FDA approved food grade plastic barrels                                               5 gallon plastic jugs                                                                                                  two-liter soda bottles
Water Pretreatment
Water from a chlorinated municipal water supply does not need further treatment when stored in clean, food-grade containers.
Non-chlorinated water should be treated with bleach. Add 8 drops of liquid household chlorine bleach (5 to 6% sodium hypochlorite) for every 4 liters (one gallon) of water. Only household bleach without thickeners, scents, or additives should be used.

Storage
Containers should be emptied and refilled regularly.
Store water only where potential leakage would not damage your home or apartment.
Protect stored water from light and heat. Some containers may also require protection from freezing.
The taste of stored water can be improved by pouring it back and forth between two containers before use.
Water Purification
If your water supply is not known to be safe or has become polluted, it should be purified before use. Water purification is generally a two-step process.
Step 1: Clarify
Cloudy or dirty water must first be made clear. It should be passed through filter paper, fine cloth, or some other filter. It should be allowed to settle, and then the clear water on top can be carefully drawn. Filtered or clear settled water should always be disinfected before use.
Step 2: Disinfect
Boiling Method
Bringing water to a rolling boil for 3 to 5 minutes will kill most water-borne microorganisms. However, prolonged boiling of small quantities of water may concentrate toxic contaminants if present.
Bleach Method
Adding 8 drops of fresh liquid household chlorine bleach (5 to 6% sodium hypochlorite) to every 4 liters (one gallon) of water will kill most microorganisms. Only household bleach without thickeners, scents, or additives should be used. The use of bleach does not address toxic contamination.
Commercial Water Filters
Commercial water filters can effectively filter and purify water contaminated with microorganisms, toxic chemicals, and heavy metals. Their effectiveness depends on design, condition, and proper use.
Water storage for 72-hour kits
You should store 1 gallon of water per person, per day.
example: A family of 5 should have 15 gallons of water in their 72-hour kit.
Find ways to help make that water easily portable in case you need to ‘grab and go’ quickly. (Storing all 15 gallons in one container would not be easily carried)

These 8-gallon containers on wheels can work well. Easily transported.
                                   
                                                                  (for sale on Amazon for $35)

Wednesday, July 24, 2013

Family Support Group Resources


Dear Sisters,

This Tuesday we began the family support group at my home.  If you were unable to attend, but are interested in the material that was covered, you can download the manual we will be using and follow along with us.  The twelve step program is designed to bring us to Christ and to make the atonement active in our lives.  And for those who have watched a loved one struggling with addiction, it can help us bind up the broken heart.

The link to the manual:

Love,
Merilee Clay

Friday, July 12, 2013

Triple Berry Pie Recipe


Triple Berry Pie

Triple Berry Pie recipe
time
prep:
20 min
total:
1 hr 10 min
servings
total:
8 servings

what you need

2
cups  halved strawberries
1
cup  blueberries
1
cup  raspberries
1
cup  sugar
1/4
cup  MINUTE Tapioca
1
pkg.  (15 oz.) ready-to-use refrigerated pie crusts (2 crusts)
1
Tbsp.  butter or margarine

make it

MIX berries, sugar and tapioca in large bowl. Let stand 15 minutes.
PREHEAT oven to 400°F. Prepare pie crust as directed on package for 2-crust pie, using 9-inch pie plate. Fill with fruit mixture. Dot with butter. Cover with second pie crust. Seal and flute edge. Cut several slits in top crust to permit steam to escape.
BAKE 45 to 50 minutes or until juices form bubbles that burst slowly. Cool.

Cheesecake Recipe

Here is the Cherry Cheesecake Recipe from our Enrichment activity:


Cheesecake  (Wanda Franklin’s version)

Crust
1 ¼ cup graham cracker crumbs
¼ cup sugar
¼ cup melted butter

In 9” pie pan, stir together graham cracker crumbs and sugar until well mixed. 
Stir melted butter into crumb mixture until well mixed, then press crumbs evenly on bottom and sides of pie pan with the bowl of a spoon.
In an oven that has been preheated to 350 degrees, bake pie crust for 10 minutes.

Filling
8 oz. cream cheese
1 large egg
14 oz. can of sweetened condensed milk
¼ teaspoon salt
3 tablespoons lemon juice (fresh or bottled)

After pie crust has baked for five minutes, start making filling. 
Cut cream cheese into four or more pieces and put into blender with egg, milk, and salt.
Blend until smooth.
While blender is running slowly, add lemon juice in center and blend until mixed well.  (Lemon juice starts firming up the filling, so it’s easier if you add the lemon juice just before you pour the filling into the pie crust.  If the pie crust is not done yet, you can let the mixture rest in your blender.  When the pie crust is ready, start the blender back up and add the lemon juice.)
When pie crust has finished baking, remove it from oven and turn oven down to 300 degrees.
Pour filling into baked pie crust.
Bake cheesecake in 300 degree oven for 50 minutes or until top is very lightly browned and mostly firm.
If you don’t have a blender, you can let the cream cheese soften, then use a mixer to make the filling.

Topping
1 can of any kind of pie filling or you can use any kind of fresh fruit with or without a sugar glaze or you can make your own topping, such as the following:

2 cups blueberries or pitted sour cherries (pie cherries)
½ cup sugar
2 tablespoons cornstarch
¼ cup fruit liquid and/or water
1 teaspoon vanilla flavoring  (or ½ tsp. vanilla plus ½ tsp. almond is nice for cherries)

If using frozen blueberries or  cherries, let them thaw completely, then drain off liquid into a measuring cup.  Fresh pitted cherries may also have some cherry liquid that you can use. 
If you don’t have ¼ cup of drained liquid, add water to make ¼ cup.
If you have more than ¼ cup of drained liquid from the two cups of fruit, use all of it.
Put fruit liquid/water, sugar, and cornstarch in saucepan over medium heat and stir constantly until cornstarch starts losing some of its milky color.  Add half of fruit and continue stirring constantly but gently.  When mixture starts becoming firm, add remaining fruit and stir gently until mixture is the consistency of pie filling.  The purpose of adding the fruit by stages is so that most of the fruit will retain its shape.
After removing pie filling from stove, stir in flavoring.
Let cheesecake and topping cool to room temperature, then spread filling on cheesecake.
If some cherries are showing the side where their pit was removed, turn them over with a spoon to show their best side.
Keep refrigerated.

Note: When I freeze blueberries or cherries for pie filling, I mix 2 cups of fruit with ½ cup of sugar and freeze the mixture in individual containers.   Sugar helps the fruit freeze better.  When I cook the pie filling, I don’t add more sugar.  I just add cornstarch to the sugary liquid that drains off the fruit before I cook it.

Key Lime Pie Recipe


Here is the recipe for the Key Lime pie at the Food Preservation activity:

Key Lime Pie VII
 
recipe image

INGREDIENTS:
1 (9 inch) prepared graham cracker crust
3 cups sweetened condensed milk
1/2 cup sour cream
3/4 cup key lime juice
1 tablespoon grated lime zest
DIRECTIONS:
1.Preheat oven to 350 degrees F (175 degrees C).
2.In a medium bowl, combine condensed milk, sour cream, lime juice, and lime rind. Mix well and pour into graham cracker crust.
3.Bake in preheated oven for 5 to 8 minutes, until tiny pinhole bubbles burst on the surface of pie. DO NOT BROWN! Chill pie thoroughly before serving. Garnish with lime slices and whipped cream if desired.

Food Preservation Night

Our Food Preservation Night was a great success!! 


 Elizabeth Grange taught us how to prepare canned butter (information at the end of this post for those who are interested). We each got our own jar of butter to shake and shake and shake.


 Becky Harms taught us about freezer jam, apple butter, different canning methods, and little tricks and tools to make it easier. Then we got to sample the jams and apple butter!


After the classes were finished we enjoyed ice cream and homemade pies (while still shaking our butter jars).

Special thanks to Carolyn Friberg for coordinating all the details and for the lovely decorations. A big thank you to Elizabeth Grange and Becky Harms for teaching. Thank you to all those who made pies and thanks to all those who came.


CANNED BUTTER


by Elizabeth Grange
Canned butter is shelf stable for 5 to 7 years. It requires no refrigeration either before or after opening. It is great for food storage, camping, or emergencies.
Tips: When processing a lot of butter, the more people you have to shake the jars, the better. This would be a fun family activity.  Any brand of SALTED butter will do.  Unsalted butter will work, but has a toffee-like texture.  Each pound of butter does slightly more than a pint. 11 pounds of butter will do 12 pints.  
Sanitize the jars and lids.  Meanwhile, unwrap the butter and put them in a saucepan or large pot to melt.  Stir often to prevent burning.  A double boiler or small pan balanced over a pot of boiling water works best for me since butter burns quickly and I tend to get diverted easily.  

When jars are sanitized and butter is melted, pour butter into jars using a sterile funnel.  Be sure to leave 1 inch space at the top of the jars.  Place the hot, sanitized lids on top of jars and screw on the rings.  

Shake, shake, shake the jars of butter, holding them with a dish towel since they will be hot.  If, like me, you are working alone, you can shake one jar for a minute, then another, rotating the process. I wouldn't can more than 4 jars at a time unless you have a lot of energy, or someone to help you with the shaking.  After the butter solidifies and the jar is cool to the touch, refrigerate it over-night, or until it is completely solid. Now it is ready for long-term storage. 


Friday, May 31, 2013

Couch Needed


If anyone has a spare sleeper sofa or a futon to donate, please let me know.  There is a sister in our ward who needs somewhere to sleep and her couch is fairly broken down.

Please contact Merilee Clay if you can help. Thanks!

Saturday, May 18, 2013

Family History FHE Ideas


This month the Bishop has challenged us to have Family Home Evening every week and to have at least one of those focus on Family History. How are you doing on that goal? There are still two more weeks, so it's not too late! Here are a few family history ideas that might be helpful to those of you who might be struggling with where to begin, especially when you are inexperienced and/or have small children.

For the Little Ones, this blog has a simple lesson outline. There are some adorable video clips done by familysearch.org that are sure to get the interest of young children.

Another idea, that fulfills requirements in Faith in God as well as Personal Progress, is to fill out a pedigree chart together. You can find a simple one geared toward children here (it also includes interview questions), or a more detailed one here. Use these forms as a catalyst to talk about your ancestors and share facts and stories.

Familysearch.org has gone through a major over hall in the last several months. Check it out! You can sign in using your lds account. Find your family tree. Look at your fan chart. Just get on and explore. There are a lot of tutorials and videos available at https://familysearch.org/learningcenter/. Particularly there are three introductory videos (which are actually easier to locate on theyouth.lds.org family history section).

Speaking of the youth site, there is a TON of excellent information collected for youth about family history at https://www.lds.org/youth/family-history

There are many videos geared toward the youth. They also have youth that have commented and shared their own experiences with family history work.

For those of you who might be a little more adventurous try and find an ancestor in the 1940 Census. There is a nice video that explains what a census is and how it is helpful in Family History work. Try and put as much information as you can in the search fields. If you do not get an accurate result try broadening your search by removing some of information. Often there are errors in the information that was recorded by the census taker (and subsequently indexed), including misspelling of names, incorrect ages and birthplaces. Don't give up! Despite these flaws census records are valuable snap shots of a family in time. Find yours!

If you have any questions contact a ward family history consultant or the family history center. You are not alone, there are many people that are willing to help!

Happy Tree Climbing!

Wednesday, May 15, 2013

General Conference Talk Lesson Schedule


Elders Quorum/High Priests/Relief Society’ 4th Sunday Lessons

June 2013 through October 2013


  • June 23, 2013 General Conference Talk – President Thomas S. Monson – Obedience Brings Blessings (Sunday Morning April 2013 Conference)

  • July 28, 2013 General Conference Talk – Elder Stanley G. Ellis – The Lord’s Way (Saturday Afternoon April 2013 Conference)

  • August 25, 2013 General Conference Talk – President Boyd K. Packer – These Things I Know (Saturday Morning April 2013 Conference)

  • September 22, 2013 General Conference Talk – Elder L. Whitney Clayton – Marriage: Watch and Learn (Sunday Morning April 2013 Conference)

  • October 27, 2013 General Conference Talk - Elder L. Tom Perry – Obedience to Law is Liberty (Sunday Morning April 2013 Conference)

Tuesday, May 14, 2013

"Stuff Swap" Donation Info


For those of you who are interested in participating in the "Stuff Swap" activity with the Ellicott City Ward:

They are planning on having two sessions for the sisters to drop stuff off/sort items at the stake center. The first is Saturday, June 8th from 10-12pm and the second is Tuesday, June 11th from 10-12pm.

Once again, the actual activity is June 11th from 7-9pm. Anyone is welcome to come and look through the items. You don't have to donate to take. Anything left over will be donated to charity.

Sunday, May 12, 2013

Jennifer "Jen" Danielle Kernan


We are sorry to announce that Stephanie Brosius' sister, Jen, passed away this past week. Many of you knew Jen since she grew up in our ward. Please keep Stephanie and her family in your thoughts and prayers. Click here for information on the funeral services and to read the obituary.


Also, if you knew Jen and have any memories or experiences that you would like to share the family is compiling a memory book for Jen's posterity.

Wednesday, May 8, 2013

Stuff Swap

The Ellicott City Ward is hosting a "Stuff Swap" on June 11th from 7 to 9 p.m at the church and invited our ward to participate. They are planning on providing tables for the following categories:

Women's Clothing
Men's Clothing
Children's Clothing
Books
Toys
Small House Hold Items (no furniture.)

Basically, you bring the things you want to give away and put them on the appropriate tables and then you are free to browse and take whatever you want. All leftover items will be donated to charity.

Friday, April 26, 2013

Cancer Research Study


Here is a message from Wanda Franklin about an opportunity to help with Cancer Research:


I am a participant in this study and have a brochure about it that I’d be glad to give to you.  They need more participants and have appointments available in June.  Participation is free, and our participation helps cancer research.

You can find more information at www.cancer.org/cps


Saturday, March 16, 2013

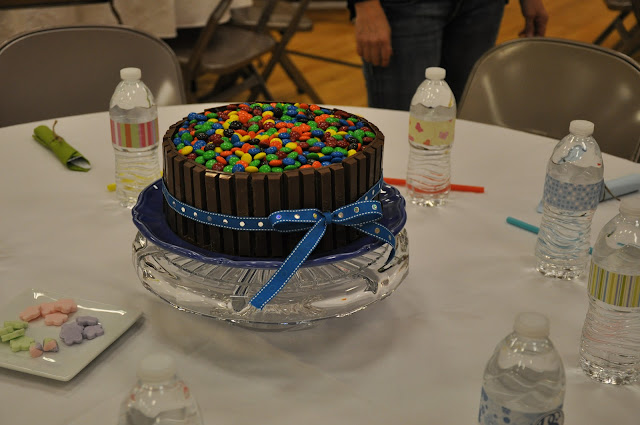
Relief Society Birthday Dinner

The Relief Society Birthday Dinner was a big success! Thank you to all those who helped put this great event together, all those who made cakes, and all those who came. We missed those of you who couldn't make it -- hopefully you can make it next year!

Here are a few of the highlights...


Tuesday, March 12, 2013

Seneca Stake Preparedness Fair

The Seneca Stake is putting on a Preparedness Fair this Saturday:

Below is a schedule of classes for the Preparedness Fair on Saturday,16 March 2013.  It runs from 9:00 am to 4:00 pm.  It will be held at 18900 Kingsview Road in Germantown, MD. If you would like a copy of the class schedule you can email c2bulletin@gmail.com or click on the image below to enlarge.

There will be an assortment of 20 and 50 minute classes, from 5 to 7 every hour to choose from.  The classes will be on a variety of subjects related to preparedness and self-reliance. 

There will also be snacks available to purchase.

The fair is free and open to the public. Everyone is welcome, and encouraged to invite friends and neighbors.


Monday, March 4, 2013

Looking Ahead: Temple Trips and Family History Classes


Here is the schedule for our Relief Society Temple Trips and Family History Classes for the next six months. Please mark these dates on your calendar and join us!


  • April 17 (Wed.) 11:00 am temple session (meet at the church at 9:45 am)
  • May 23 (Thurs.) 10:00 temple session (meet at the church at 8:45 am)
  • June 12 (Wed.) family history class from 9:30-12:00 (meet in the Family History Center in the lower level of the church)
  • July----(summer break)
  • August ----(summer break)
  • September 25 (Wed.) 10:00 am temple session (meet at church at 8:45 am)
If you have questions please ask Shawntel McPhie (mcphiemom@hotmail.com)

Monday, February 25, 2013

Organizing Important Documents

There was a lot of great information at our Organization Fair a few weeks ago. If you were not able to attend we missed you and hope you will make it to the next activity (our Relief Society dinner on March 13th at 7pm). One of the booths at the fair was all about organizing important documents. Here is some information to help you get started...


Organizing Important Documents

1.  Supplies you will need to put your documents together.

  • A. 1-1/2” to 2” Binder
  • B. Page Protectors (25 to 50 count)
  • C. Package of 8 or 10 Page Dividers (the style used with page protectors)

2. Items you should put into your binder: (for each individual)

  • A. Last Will and Testament
  • B. Durable Power of Attorney
  • C. Advanced Director/Living Will/Declaration & Appointment of Agent
  • D. Beneficiary Documents 
    • 1. Pensions, Investments, Bank/Savings, Life Insurance, etc.
  • E. House/Property Deeds: Such as Owner’s Title and Insurance Policies. 
  • F. Car Titles and Insurance Policies
  • G. Savings Bonds
  • H. Miscellaneous: Such as Drafts of Legal Papers, Estate Planning, etc.


Thursday, February 7, 2013

Online Food Storage

Did you know you can order cases of food storage on the church website?
They will even ship it to your home for FREE!

So if you can't get down to can your own food, you can still have some of the basics!

Click on the link below to submit an order!

          $31.00                    $21.25                       $30.00
       Starter Kit                Quick Oats              White Wheat


       $32.00                       $30.75                     $40.75
    Whit Flour                 White Rice               Pinto Beans


$28.00   
Red Wheat